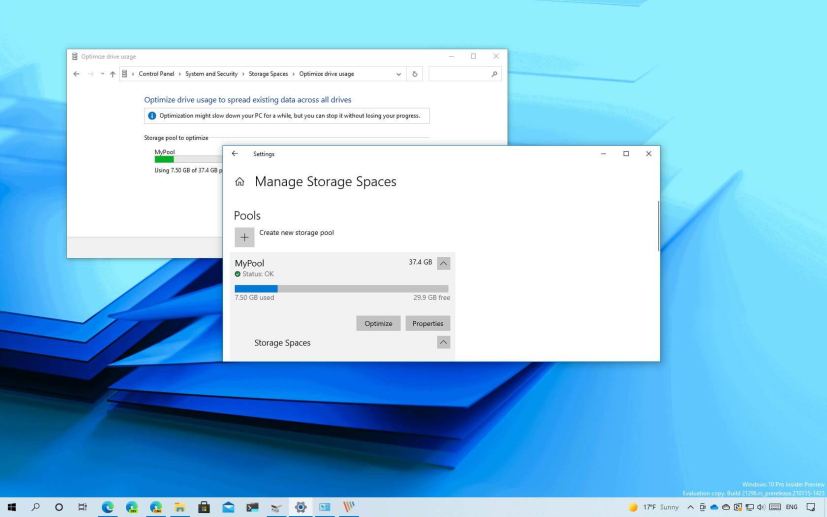
On Windows 10, if you use Storage Spaces to store and protect your data from hardware failure when you add a new drive to a storage pool, it is always recommended to optimize drive usage.
The ability to run an optimization spreads existing data across the available drives, including the new one, to better use the space.
When adding a new drive to an existing storage pool, the process gives you the option to optimize it. However, if you cleared the option, or for any other reason, Windows 10 Storages Spaces includes an option to optimize a pool manually using the Settings app (build 21286 and higher) or Control Panel.
In this guide, you will learn the steps to optimize the storage usage of a pool for Storage Spaces on Windows 10.
How to optimize storage pool using Settings
To optimize a pool in Storage Spaces, use these steps:
-
Open Settings on Windows 10.
-
Click on System.
-
Click on Storage.
-
Under the “More storage settings” section, click the Manage Storage Spaces option.
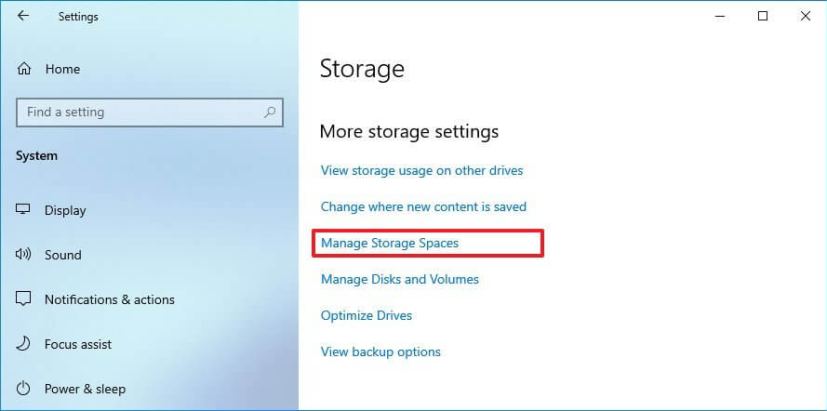
Settings Manage Storage Spaces -
Select the storage pool to reveal the available options.
-
Click the Optimize button.
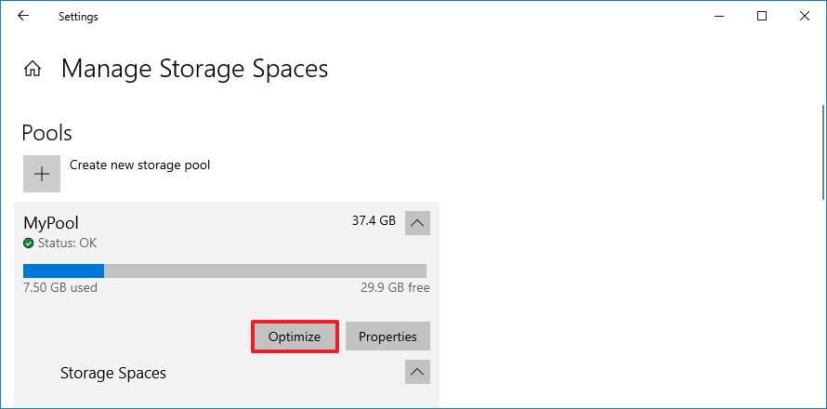
Storage Spaces optimize storage pool Quick tip: Alternatively, click the Properties button and then click the Optimize button.
Once you complete the steps, the process will begin spreading the data across the available drives participating in the pool. Depending on the amount of data, this could take a long time. As a result, it is recommended to run this option when no one is accessing the storage.
How to optimize storage pool using Control Panel
To optimize the storage usage of a pool in Storage Spaces, use these steps:
-
Open Control Panel.
-
Click on System and Security.
-
Click the Storage Spaces option.
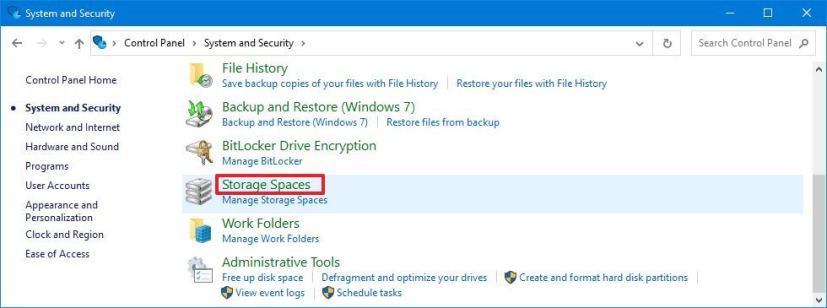
Control Panel Storage Spaces -
Click the Change settings button.
-
Under the storage pool, click the Optimize drive usage option.
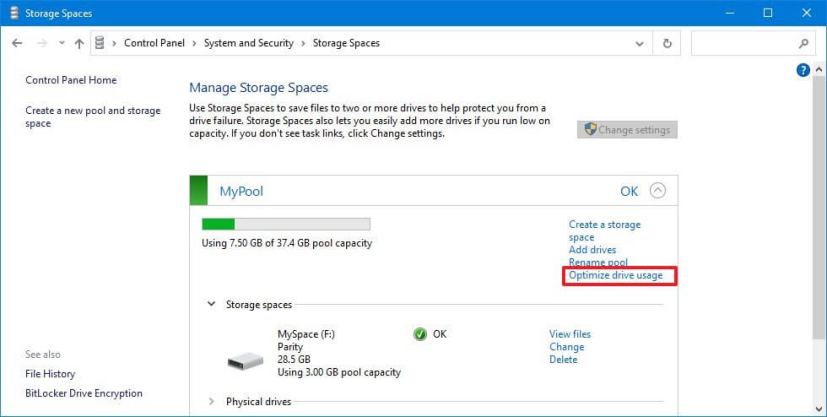
Optimize drive usage option -
Click the Optimize drive usage button.
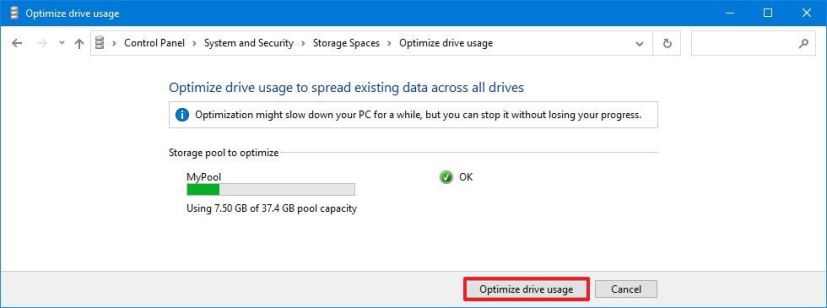
Control Panel optimize storage pool
After you complete the steps, the optimization process will begin and depending on the amount of data, this can take a long time, and the device’s performance may slow down.
While you can run the optimization at any time, usually, it is only needed when upgrading the pool with a new drive. Otherwise, Storage Spaces can spread the data across the disks automatically.
