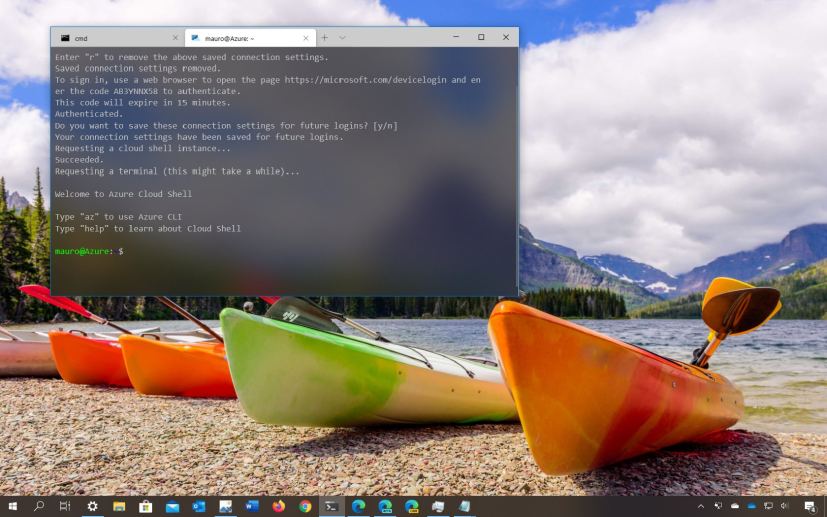
In Microsoft Azure, the “Azure Cloud Shell” experience allows you to manage tasks for cloud services using command lines (using Bash or PowerShell) securely through the web browser.
However, if you want a more local desktop experience, it’s also possible to access the Cloud Shell from the Windows Terminal app on Windows 10. Once configured, you can save the credentials for future seamlessly logins.
In this guide, you’ll learn the steps to connect the Windows Terminal app to your Azure account to use PowerShell command to complete tasks from Windows 10.
How to configure Azure Cloud Shell on Windows Terminal
To connect Windows Terminal with Azure Cloud Shell, use these steps:
-
-
Sign in with your credentials.
-
Click the PowerShell option.
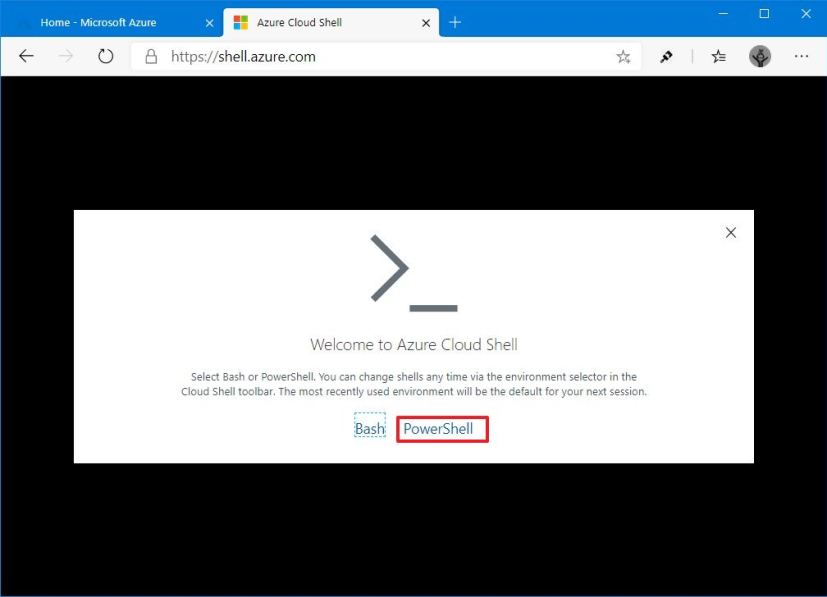
Shell Azure PowerShell option -
Click the Create Storage button (if applicable).
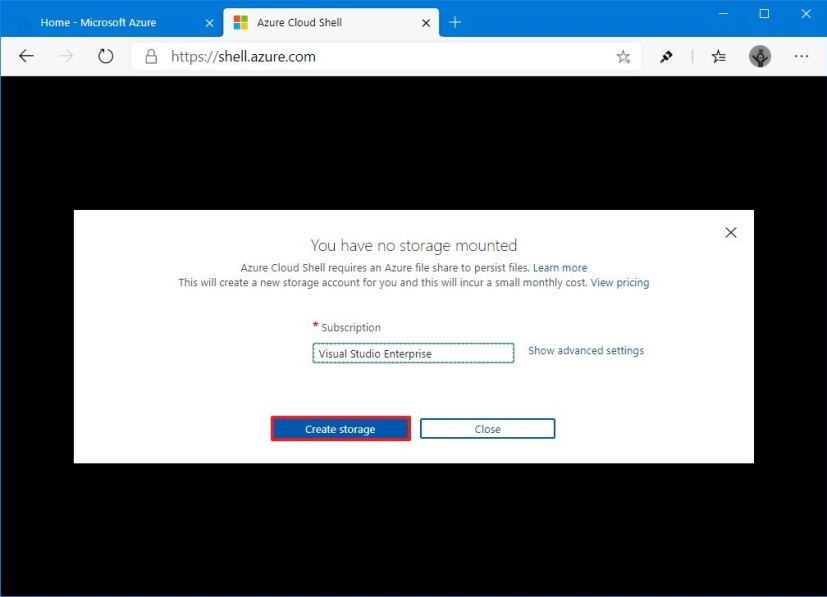
Azure create storage option -
Open Windows Terminal on Windows 10.
-
Click the down-arrow button and select the Azure Cloud Shell option.
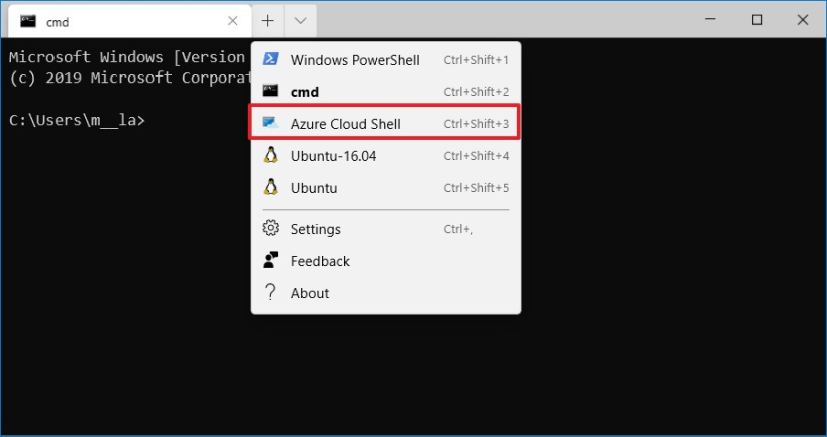
Windows Terminal Azure Cloud Shell option -
Copy the Windows Terminal connection code.
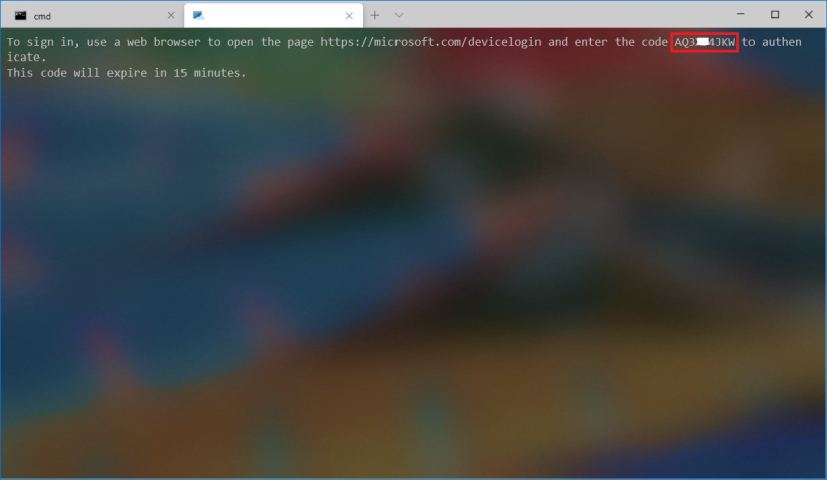
Windows Terminal Azure connection code -
Confirm the connection code.
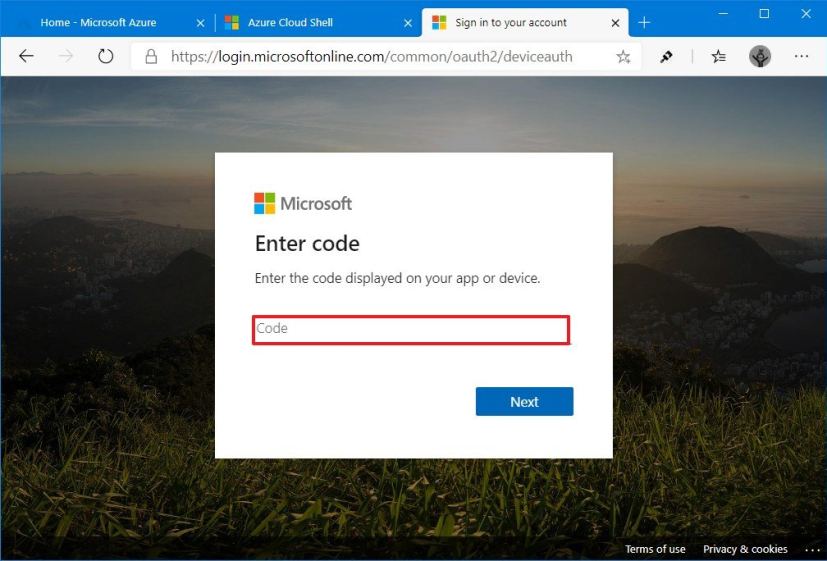
Windows Terminal Azure code confirmation -
Click the Next button.
-
Select your Azure account from the list.
-
Press the Y key to save the settings for future logins in the Windows Terminal app.
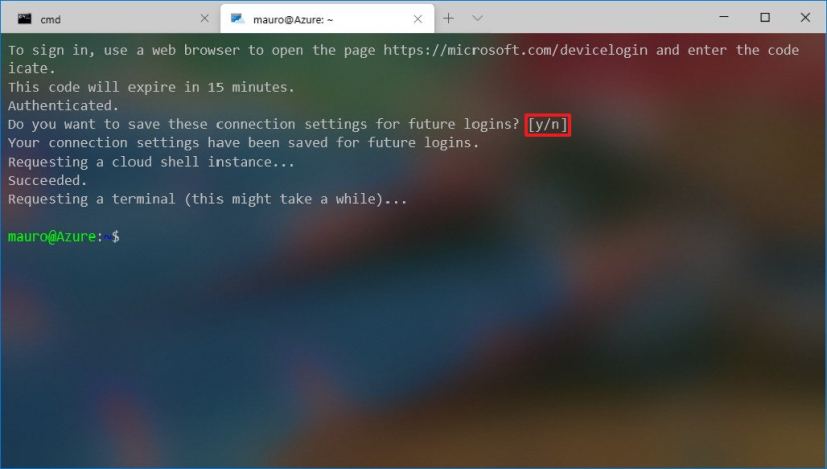
Windows Terminal Azure connection completed
Once you complete the steps, you can start using the Windows Terminal on Windows 10 to complete tasks on Azure using PowerShell commands.
