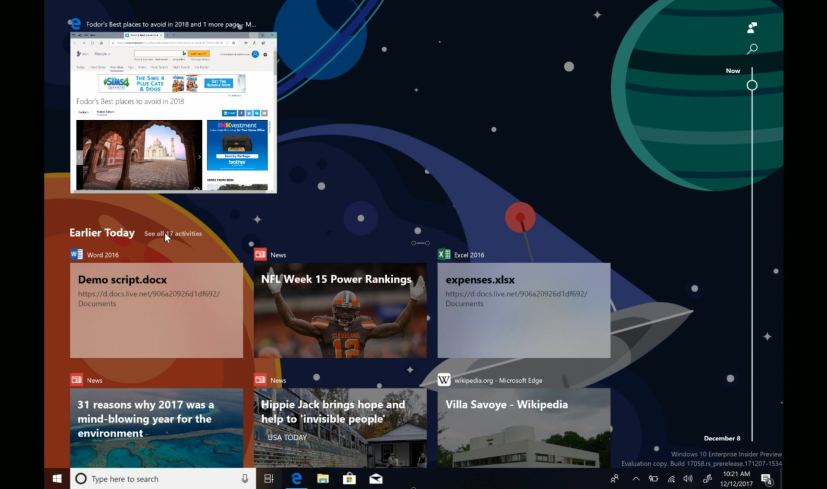
Timeline on Windows 10 is a feature that leverages the Microsoft Graph and allows you to get back to activities (for example, app, document, website) you were working in the past. These activities could have been started on the same computer or other devices, such as a laptop, tablet, and even your phone that are connected with the same Microsoft account.
The only caveat is that in order to resume tasks across devices, Windows 10 has to track your PC activities, which for many users isn’t a big deal, but for others it can be a privacy or security concern.
If Timeline isn’t for you, or you simply don’t want Windows 10 collecting your activities, it’s possible to disable the feature with just a few clicks using the Settings app.
In this guide, you’ll learn the steps to disable activity history which also disables Timeline on Windows 10.
- How to disable Windows 10’s Timeline using Settings
- How to disable Windows 10’s Timeline using Group Policy
- How to disable Windows 10’s Timeline using Registry
How to disable Windows 10’s Timeline using Settings
Use these steps to turn off activity history on Windows 10:
-
Open Settings.
-
Click on Privacy.
-
Click on Activity history.
-
Clear the Store my activity history on this device option.
-
Clear the Send my activity history to Microsoft option.
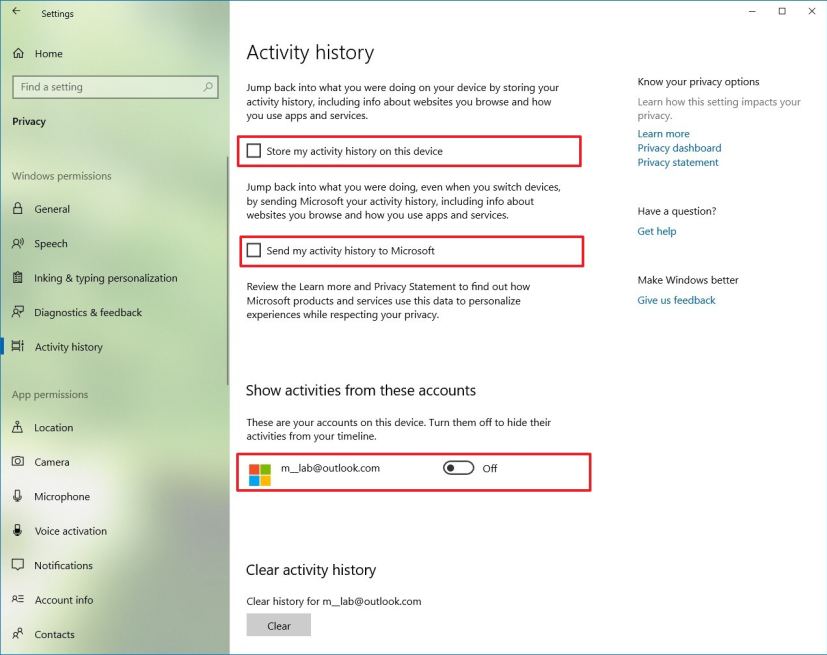
Activity history settings to disable TImeline on Windows 10 -
Under “Show activities from accounts,” turn off the toggle switch for all your accounts.
-
Jump to another settings page, and then come back to the “Activity history” page to refresh the page and make the option to delete your history available.
-
Under “Clear activity history,” click the Clear button.
-
Click the OK button to confirm.
Once you complete the steps, Windows 10 will no longer be able to collect activities on your device nor you’ll be able to resume tasks on other devices using Timeline.
It’s worth noting that this feature doesn’t clear of the data Microsoft collects about you, “Activity history” only deletes “pick up where you left off” related items.
How to disable Windows 10’s Timeline using Group Policy
Use these steps to disable Timeline using Group Policy on Windows 10 Pro, Enterprise, or Education:
-
Open Start.
-
Search regedit and click the top result to open the Registry.
-
Search for gpedit and click the top result to open the Group Policy Editor.
-
Browse the following path: Computer Configuration\Administrative Templates\System\OS Policies
-
On the right side, double-click the Enables Activity Feed policy.
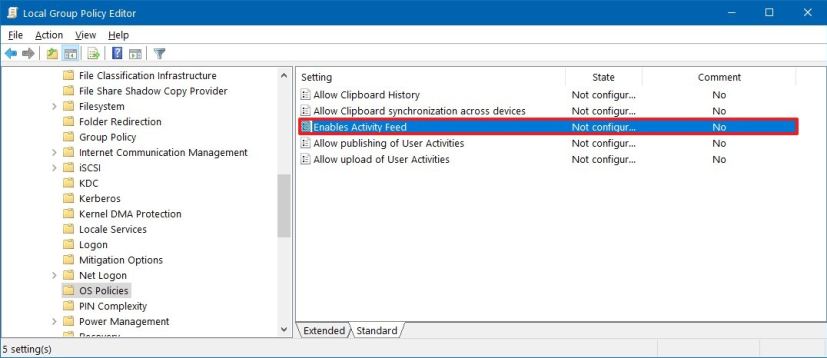
Group Policy OS Policies -
Check the Disabled option.
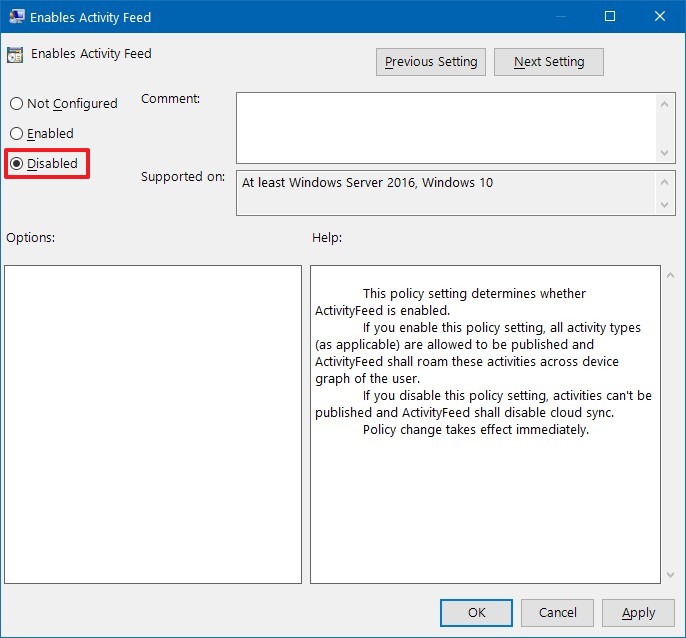
Enables Activity Feed policy -
Click the Apply button.
-
Click the OK button.
-
Double-click the Allow publishing of User Activities policy.
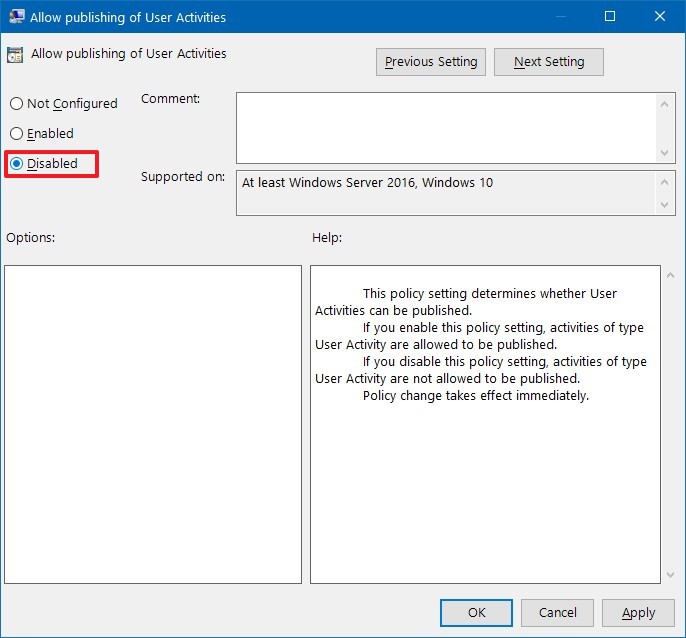
Allow publishing of User Activities policy -
Check the Disabled option.
-
Click the Apply button.
-
Click the OK button.
-
Double-click the Allow upload of User Activities policy.
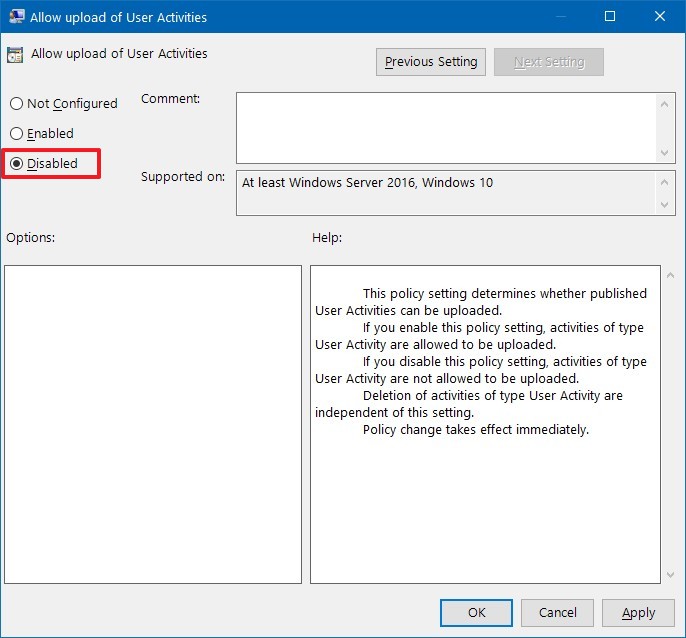
Allow upload of User Activities policy -
Check the Disabled option.
-
Click the Apply button.
-
Click the OK button.
-
Restart your computer.
After you complete the steps, Timeline will no longer work on your device running Windows 10.
How to disable Windows 10’s Timeline using Registry
Alternatively, you can permanently disable Timeline on Windows 10 modifying the Registry with these steps:
-
Open Start.
-
Search regedit, and click the top result to open the Registry.
-
Browse the following path:
HKEY_LOCAL_MACHINE\SOFTWARE\Policies\Microsoft\Windows
-
Right-click the Windows (folder) key, select New, and click on the Key option.
-
Name the key System and press Enter.
-
Right-click the System (folder) key, select New, and click on DWORD (32-bit) Value.
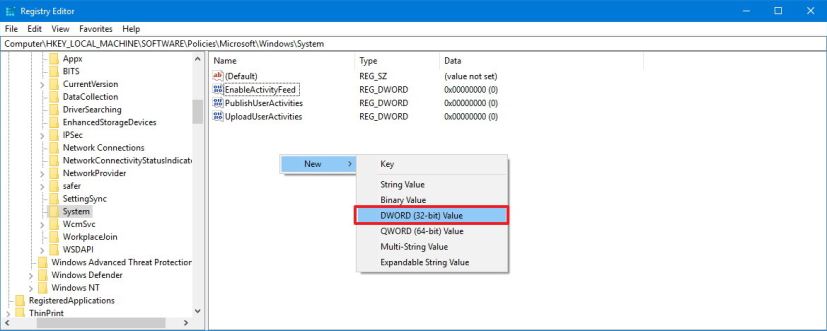
Disable Timeline using Registry -
Name the key EnableActivityFeed and press Enter.
-
Double-click the newly created key and make sure its value is to 0.
-
Right-click the System (folder) key, select New, and click on DWORD (32-bit) Value.
-
Name the key PublishUserActivities and press Enter.
-
Double-click the newly created key and make sure its value is to 0.
-
Right-click the System (folder) key, select New, and click on DWORD (32-bit) Value.
-
Name the key UploadUserActivities and press Enter.
-
Double-click the newly created key and make sure its value is to 0.
After you complete the steps, restart your computer, and Timeline should now be disabled.
At any time, you can enable Timeline again by using the same steps mentioned above, but on step No. 4, make sure to right-select Delete for the EnableActivityFeed, PublishUserActivities, and UploadUserActivities keys, and then reboot your device.
Watch the video on how to turn off Timeline on Windows 10:
Timeline is a feature expected to arrive on Windows 10 version 1803 (April 2018 Update) on April 30, 2018. If you don’t see the “Activity history” settings, it’s because you’re not running the latest version of Windows 10. These settings are available starting Windows 10 build 17040 and later.
Update July 23, 2019: This guide was originally published in December 2017, and it’s been updated to reflect the changes on Windows 10.
