Windows 10 has several security features to protect your device and data against unauthorized access, malware, and other attacks, including a powerful built-in firewall known as Microsoft Defender Firewall.
Although the Microsoft Defender Firewall does a pretty good job managing which applications and features are allowed to connect through the network, sometimes you may need to manually allow or deny an app.
In this guide, you’ll learn the steps to allow or deny app access through the firewall on Windows 10.
Allow apps through firewall on Windows 10
To allow an app through the Windows 10 firewall, use these steps:
-
Open Windows Security on Windows 10.
-
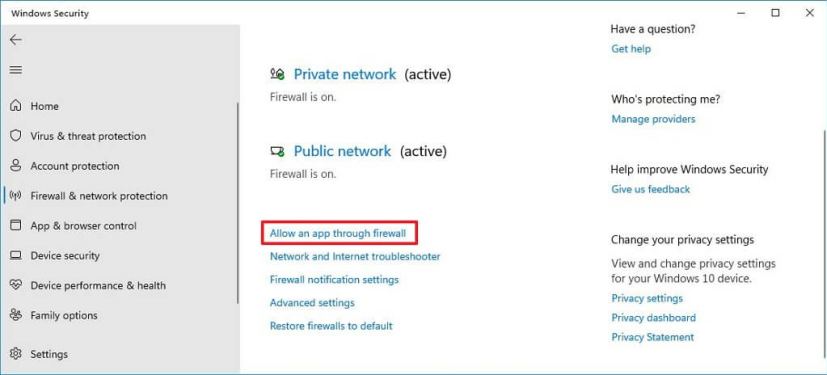
Click on Firewall & network protection.
-
Click the “Allow an app through firewall” option.

-
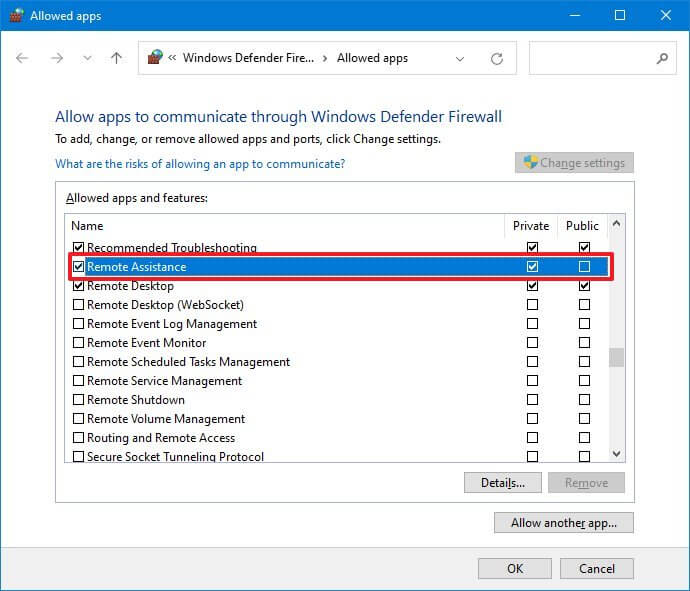
Click the Change settings button.
-
Check the app or feature you want to allow through the Windows 10 firewall.
 Quick tip: If the app isn’t on the list, click the “Allow another app” button to locate the application you want to allow.
 -
Check on which type of networks an app can access the network:
- Private — Allows the app access to the network at home or work.
- Public — Allows the app access to the network at a public place, such as in a coffee shop.
-
Click the OK button.
Once you complete the steps, the app will have full access to the network on Windows 10.
If you want to block an app through the firewall, you can follow the instructions outlined above, but in step 5, clear the checkmark for the app or feature you want to deny access to the network.
This guide focuses on the Windows 10 firewall, but if you have another security solution, check your vendor support website for specific instructions.
