Windows 11 lets you change the name of a Wi-Fi or Ethernet network adapter from within the Settings app without the need to use Control Panel. Although Windows 11 can automatically assign a name to a network adapter based on the type (Wi-Fi or Ethernet), you may sometimes need to change the name manually to specify something different.
In previous versions of the OS, if you needed to change the adapter’s name, you had to use Control Panel, but now the functionality is built inside the Settings app.
This guide will teach you the steps to rename a network adapter from the Settings app on Windows 11 as well as from Control Panel and PowerShell.
- Rename network on Windows 11
- Rename network from Control Panel on Windows 11
- Rename network from PowerShell on Windows 11
Rename network on Windows 11
To change the Wi-Fi or Ethernet adapter’s name with the Settings app, use these steps:
-
Open Settings on Windows 11.
-
Click on Network & internet.
-
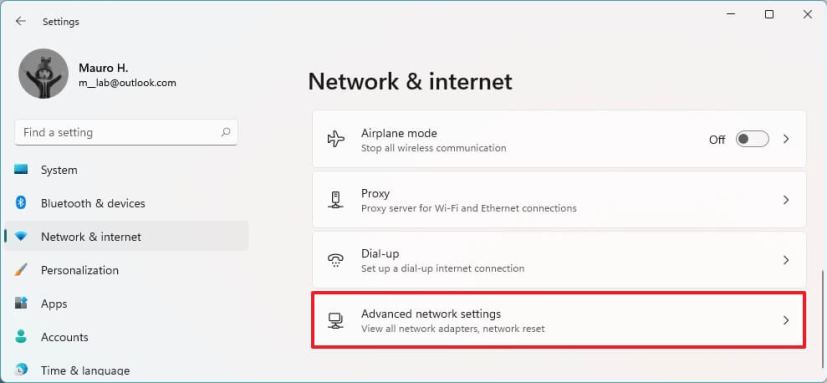
Click the Advanced network settings tab.

-
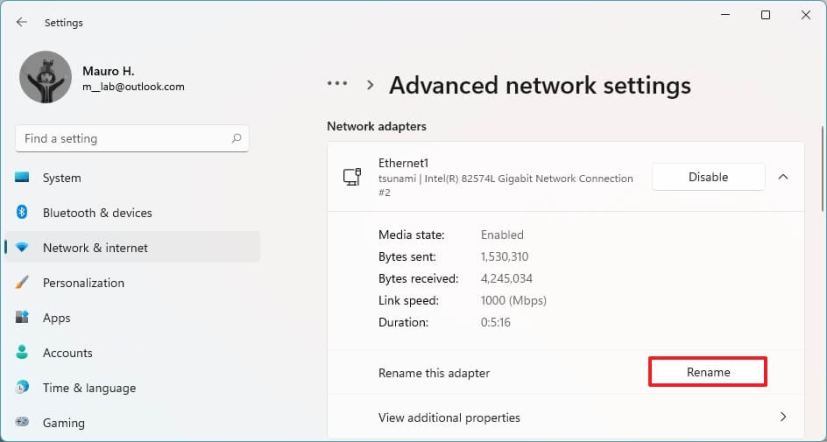
Under the “Network adapters” section, click the Wi-Fi or Ethernet adapter to rename.
-
Click the Rename button.

-
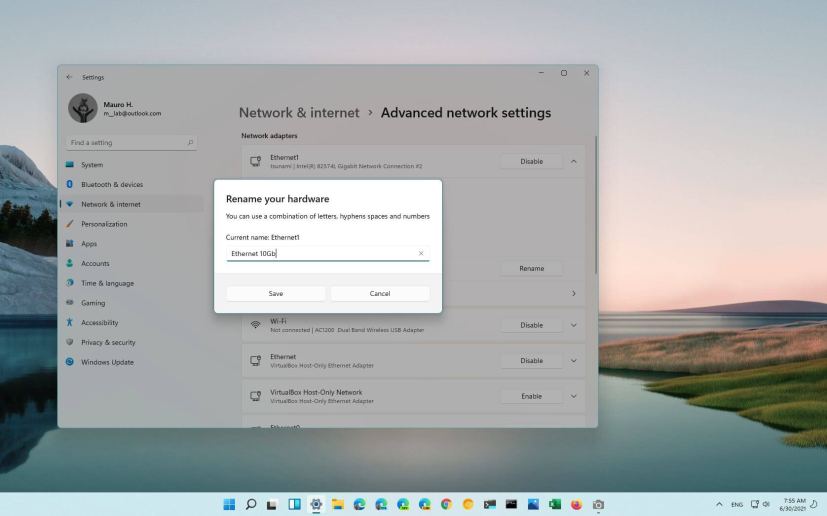
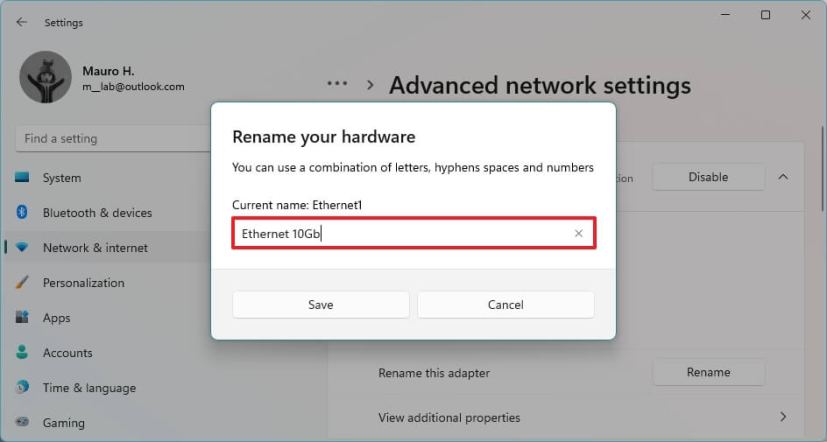
Specify a new name – for example, Ethernet 10Gb or Wi-Fi6E Card.

-
Click the Save button.
Once you complete the steps, the network adapter will reflect the new name you specified on Windows 11.
Rename network from Control Panel on Windows 11
To rename a network adapter from Control Panel, use these steps:
-
Open Start.
-
Search for Control Panel and click the top result to open the app.
-
Click on Network and Internet.
-
Click on Network and Sharing Center.
-
Click on Change adapter settings from the left navigation pane.

-
Right-click the Wi-Fi or Ethernet adapter and select the Rename option.

-
Specify a new name – for example, Ethernet 10Gb or Wi-Fi6E Card.
After you complete the steps, the network adapter will apply the new name on Windows 11.
Rename network from PowerShell on Windows 11
To change the network adapter name with PowerShell command, use these steps:
-
Open Start.
-
Search for PowerShell, right-click the top result, and select the Run as administrator option.
-
Type the following command to view all the network adapters on your computer and press Enter:
Get-NetAdapter | Format-List -Property Name -
Type the following command to rename the Wi-Fi or Ethernet adapter and press Enter:
Rename-NetAdapter -Name "OLD-NAME" -NewName "NAME-NAME"
In the command, change OLD-NAME for the current adapter’s name and NEW-NAME for the new name you want to assign. This example changes the name from Ethernet0 to Ethernet 10Gb:
Rename-NetAdapter -Name "Ethernet0" -NewName "Ethernet 10Gb"

Once you complete the steps, the PowerShell command will change the name of the wired or wireless network adapter you specified.
