On Windows 10, sometimes, a third-party driver can prevent a computer from starting correctly because of compatibility issues or other problems. When this happens, you can restart in Safe mode to remove the problematic driver or use a System Restore Point to roll back to the last good known working state. However, there will be times when the device won’t even start in Safe mode, and even the restore point will fail to apply.
If Windows 10 can’t boot correctly after installing a device driver, and Safe mode and System Restore Point doesn’t work, you can use the Windows Recovery Environment (WinRE) to uninstall drivers manually using the Deployment Image Servicing and Management (DISM) command-line tool to resolve the issue.
In this guide, you will learn the steps to uninstall an incompatible driver from the recovery environment that’s causing Windows 10 not to start correctly.
Uninstall driver when Windows 10 won’t start
To remove an incompatible driver that won’t let Windows 10 start correctly, use these steps:
-
Create a Windows 10 USB bootable media.
-
Change the computer Basic Input Output System (BIOS) settings to start from the bootable media.
Quick tip: This process usually requires pressing one of the function keys (F1, F2, F3, F10, or F12), the ESC, or the Delete key. For more accurate instructions, visit your PC manufacturer’s support website. -
Start computer with USB bootable media.
-
Click the Next button.
-
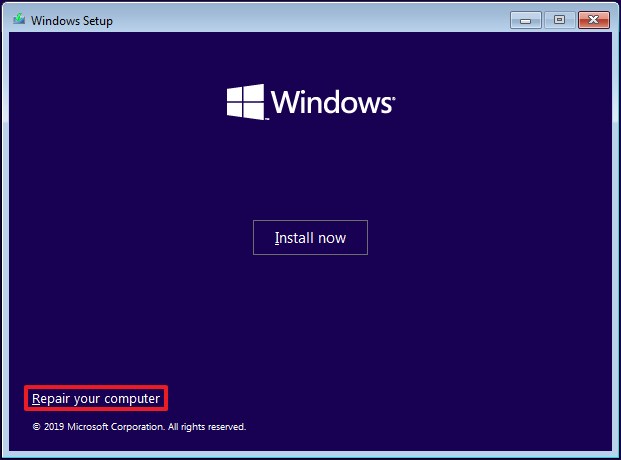
Click the Repair your computer option in the bottom-left corner.
-
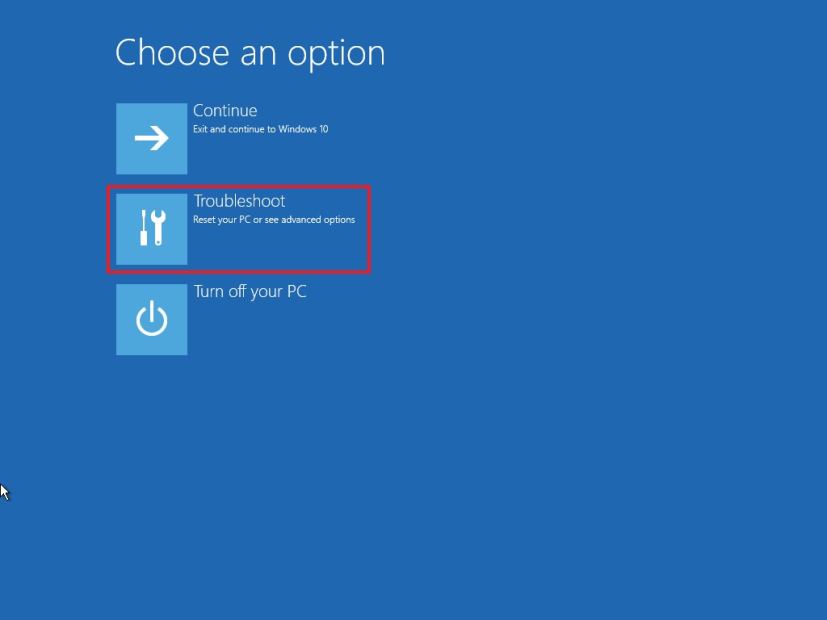
Click on Troubleshoot.
-
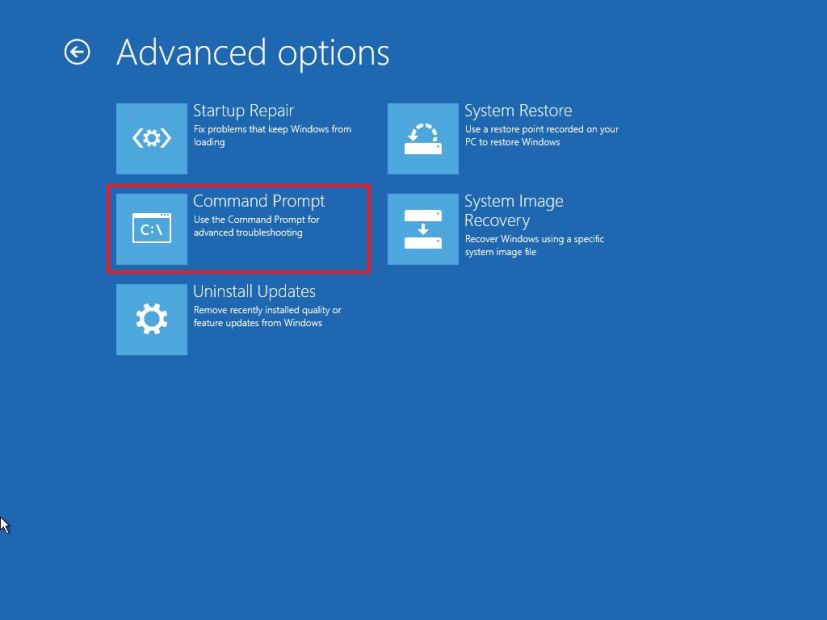
Click on Command Prompt.
-
When the computer boots in Command Prompt, it’ll start on
X:\Sources. You need to move to the drive letter where Windows 10 is installed. While the operating system resides on the main drive (C:\), when you boot your computer on recovery mode, the drive letter changes to something different. However, in most cases, the drive letter isD:orE:. Type the following command to access the correct drive letter, and press Enter:e:
-
Type the following command to verify the right drive is selected and press Enter:
dir
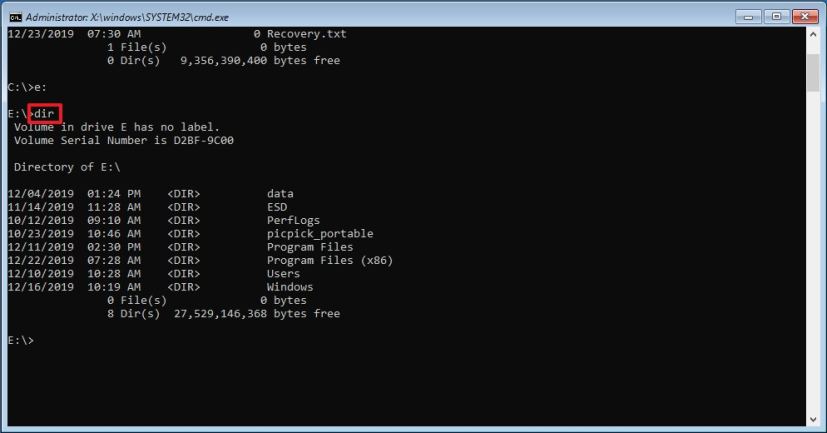
You’re in the correct drive letter if you see the “Windows” folder. If not, go back to step No. 5 and try another letter.
-
Type the following command to generate a list of all the installed drivers and press Enter:
dism /image:e:\ /get-drivers
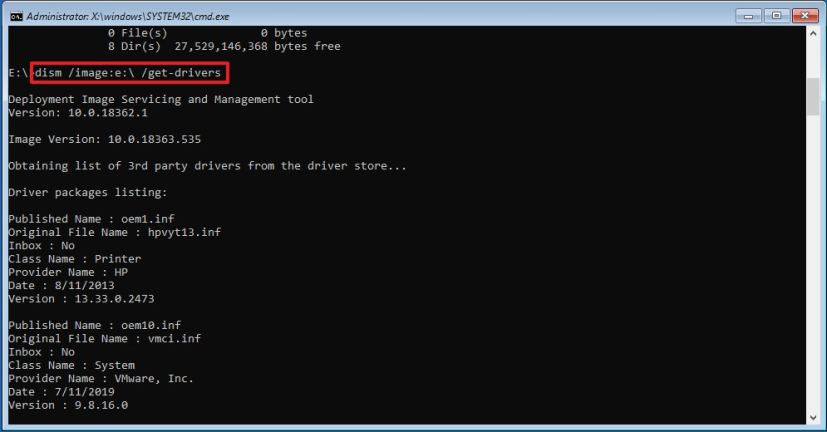
In the command, change
e:for the driver of your Windows 10 installation. -
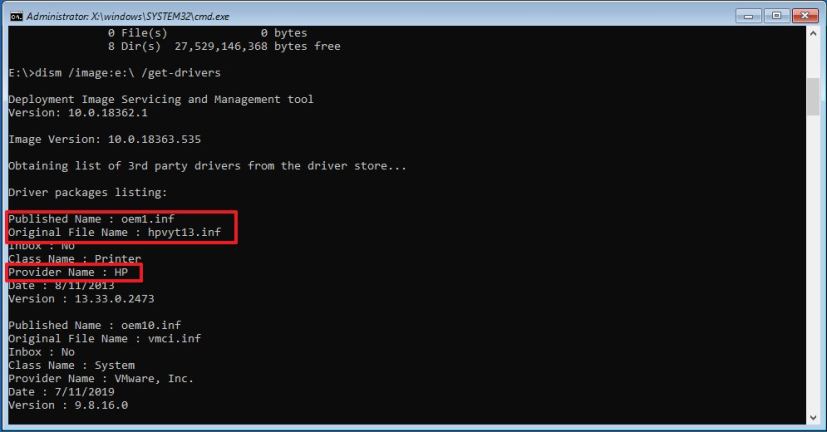
Confirm the “Publisher Name” of the problematic driver. The “Original File Name” and “Provider Name” will help you identify the driver. (Installed third-party drivers will usually carry the oem0.inf, oem1.inf, and so on. The number is the installation order, which means that the last driver you installed will have the highest number.)
-
(Optional) Type the following command to view more information about the driver and press Enter:
dism /image:e:\ /get-driverinfo /driver:oem1.inf
In the command, change
e:for the drive of your Windows 10 installation, and change theoem1.inffor the name of the driver to remove. -
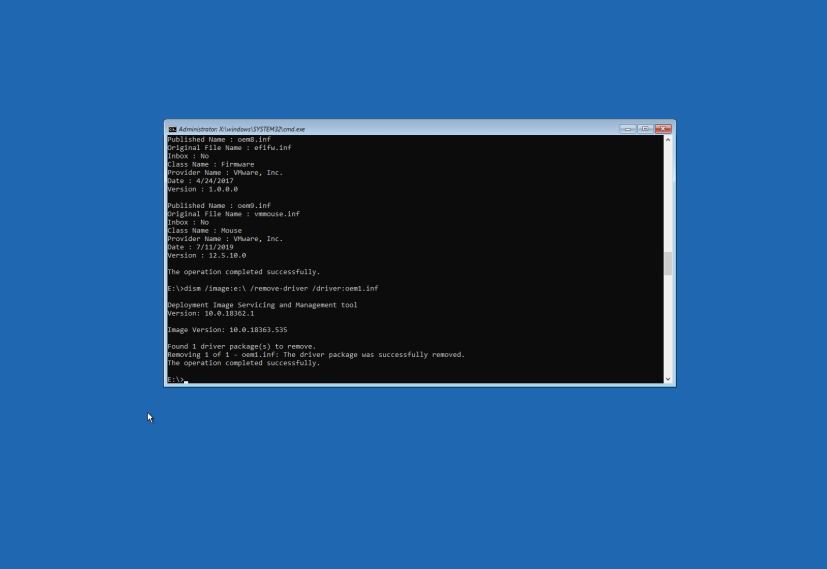
Type the following command to remove the problematic driver and press Enter:
dism /image:e:\ /remove-driver /driver:oem1.inf
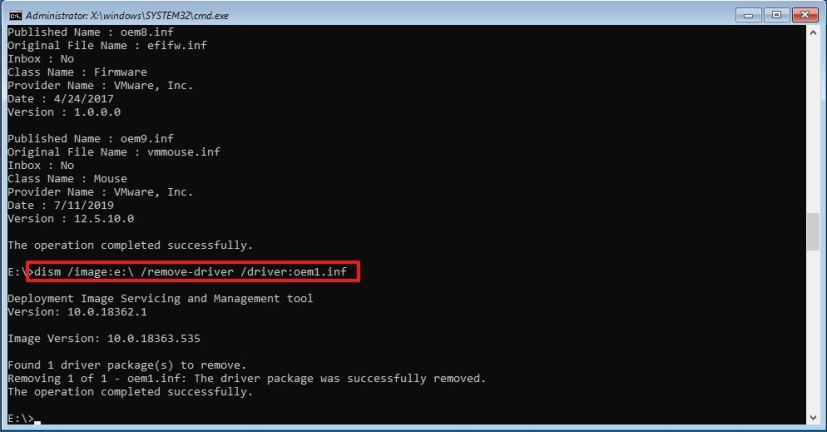
In the command, change the drive letter
e:for your Windows 10 installation drive and change theoem1.inffor the driver’s name to remove. -
Click the X to close the console.
-
Click on Continue.
Once you complete the steps, the device will reboot, and Windows 10 should start normally again.
