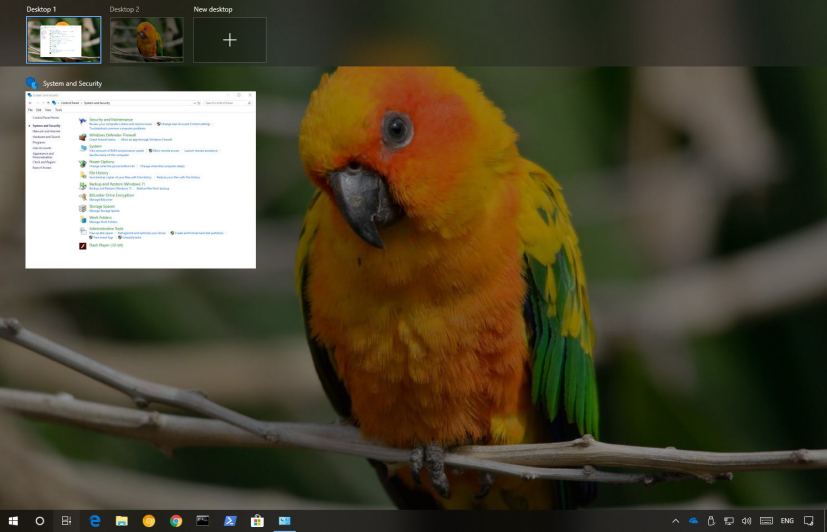
The ability to have multiple desktops is a powerful feature, as you can better organize and group your tasks, but it’s a problem when you only have one display. On Windows 10, the solution to this problem is “virtual desktops,” which is a feature that allows you to create additional desktops to overcome the limitations of a physical monitor.
Virtual desktops on Windows 10 is new, but the idea isn’t actually new. Linux and macOS had this feature for a long time, even Windows 3.x and Windows XP had this feature in one way or another, and now is coming back to the OS.
In this guide, you’ll learn the steps to create and manage virtual desktops on Windows 10.
- How to create a new virtual desktop on Windows 10
- How to switch between virtual desktops on Windows 10
- How to move an app to another virtual desktop on Windows 10
- How to show an app on all virtual desktops on Windows 10
- How to remove a virtual desktop on Windows 10
How to create a new virtual desktop on Windows 10
On Windows 10, “virtual desktops” is actually part of Task View, which also includes a list of your running applications as well as a list of your Timeline activities.
In order to create a new virtual desktop, use these steps:
-
Click the Task View button in the Taskbar (or use the Windows key + Tab keyboard shortcut).

Task View button in the taskbar -
Click New desktop in the bottom-right corner.
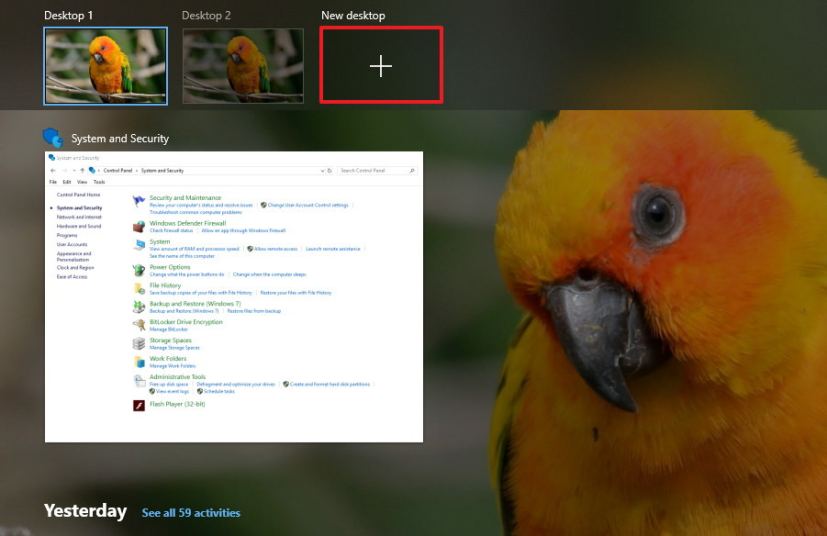
Create new virtual desktop on Windows 10
Alternatively, you can simply use the Windows key + Ctrl + D keyboard shortcut to create a new virtual desktop. If you click the shortcut continuously, you’ll create multiple desktops.
How to switch between virtual desktops on Windows 10
In order to switch between virtual desktops, use these steps:
-
Click the Task View button in the Taskbar (or use the Windows key + Tab keyboard shortcut).
-
Click the virtual desktop you want to switch to from the top-left corner.
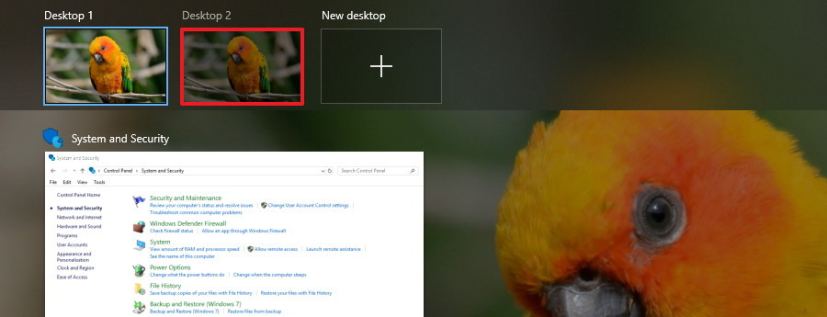
Switch between virtual desktops
Alternatively, you can use the Windows key + Ctrl + Left or Windows key + Ctrl + Right to quickly move between desktops.
How to move an app to another virtual desktop on Windows 10
In order to move an app to another desktop, use these steps:
-
Click the Task View button in the Taskbar (or use the Windows key + Tab keyboard shortcut).
-
Right-click the app and select the Move to option.
-
Select the desktop you want to move the app to, or you can click New desktop to create and move the app to a new virtual desktop.
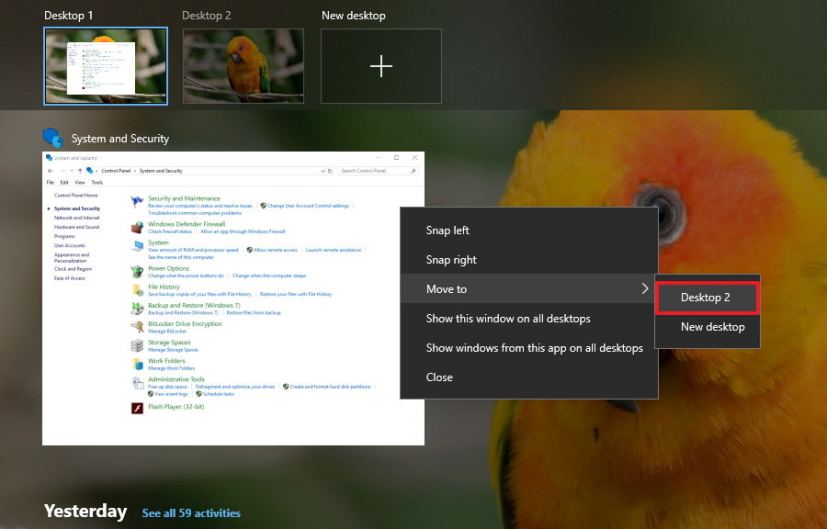
Move app or window to another desktop
Alternatively, you can click, drag and drop the app to the desktop you want while in Task View.
How to show an app on all virtual desktops on Windows 10
If you want an app or window to be available on all virtual desktops, use these steps:
-
Click the Task View button in the Taskbar (or use the Windows key + Tab keyboard shortcut).
-
Right-click the app and select Show this window on all desktops. You can also select Show windows from this app on all desktops.
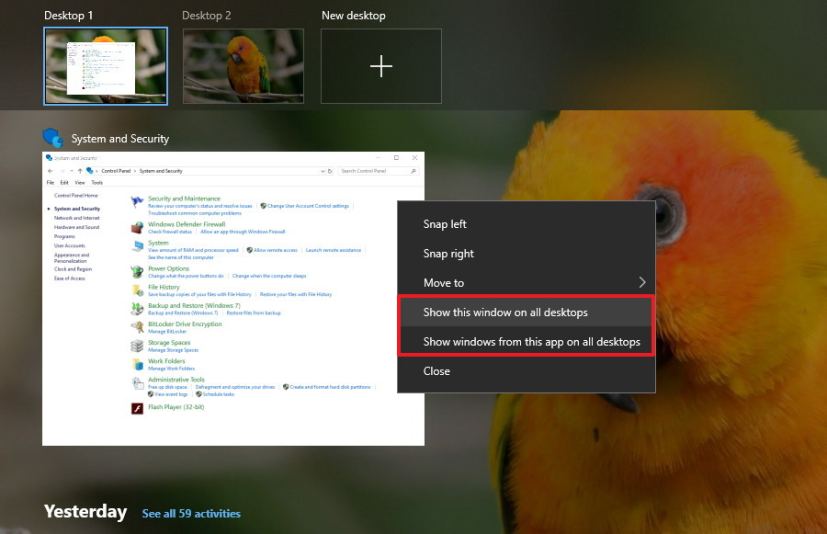
Show app or window on all desktops
How to remove a virtual desktop on Windows 10
When you no longer need a desktop, you can delete it in a number of ways:
-
Click the Task View button in the Taskbar or use the Windows key + Tab keyboard shortcut.
-
Hover over the virtual desktop, and click the X button to close it.
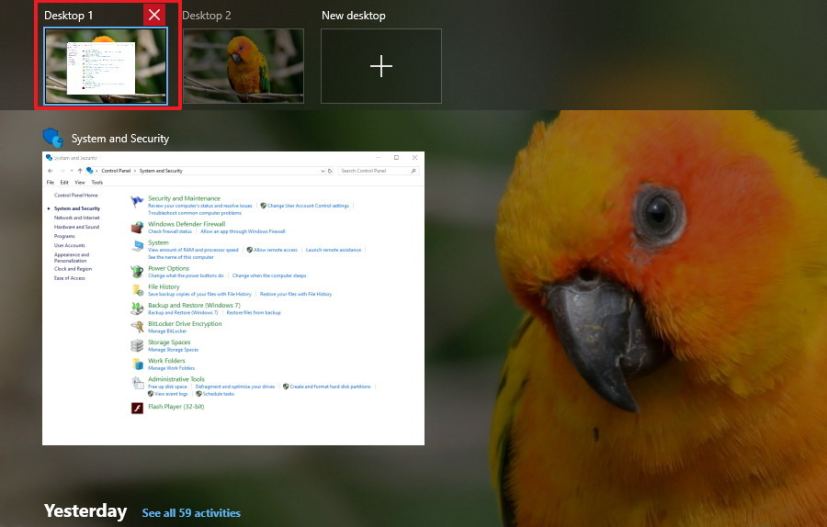
Close a virtual desktop
Alternatively, you can switch to the desktop you want to remove, and use the Windows key + Ctrl + F4 shortcut to close it.
Closing a virtual desktop doesn’t close the running apps. They will just simply move the next available desktop, and obviously, you can’t delete the last desktop standing.
Wrapping things up
The main goals with virtual desktops is to add more space to group related windows. It gives you a quick way to find and switch to any single or group of windows. You can easily re-organize your groups of tasks, and you can control the separation between your groups of windows.
In addition, you can create unlimited virtual desktops to keep your work separate from your personal stuff, and your desktops will remain after you restart your device.
If you ever forget in which desktop you left your music play, remember that you can hover over desktops to get an accurate peek of all the running apps on each desktop, and quickly jump into the app.
Although “virtual desktops” isn’t exactly a new feature, it’s a great addition on Windows 10, which once you know is there, you’ll be using it quite often. However, the experience lacks of some important features, such as the ability to rename desktops, you can’t have different backgrounds, and there isn’t a way to see the number of active desktops unless you open Task View.
Update June 26, 2018: This guide has been updated to reflect the new changes available on Windows 10 since these instructions were originally published in December 2016.
