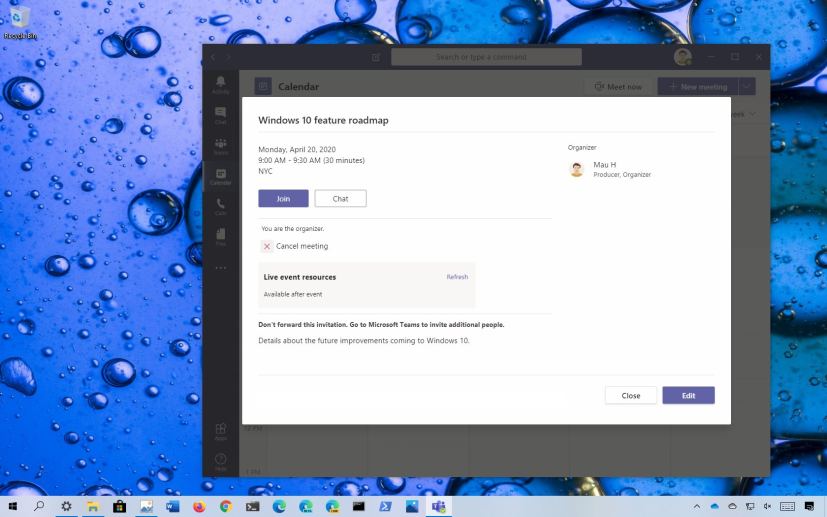
On Microsoft Teams, in addition to scheduling meetings, you can also create live events, which are similar to regular meetings, but with more options that allows you broadcast video and content to a large group of attendees.
The “live events” feature is only available for paid subscribers, and it’s been designed for one person to communicate with a large audience where the host is leading the interactions and the rest of the audience will only be viewing the content.
In this guide, you’ll learn the steps to create a live event on Microsoft Teams whether you’re running Windows 10, macOS, or Linux.
How to set up live event on Microsoft Teams
To create and schedule a live event using Microsoft Teams, use these steps:
-
Open Microsoft Teams.
-
Click on Calendar.
-
Click the down arrow button, next to the “New meeting” button, from the top-right side, and select the Live event option.
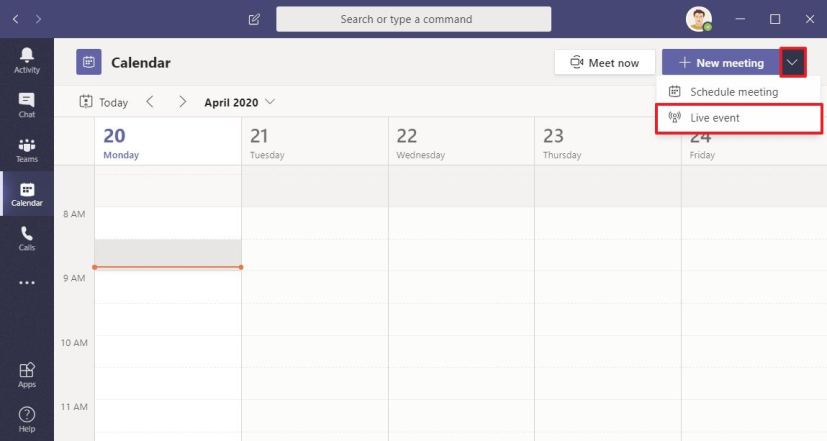
Microsoft Teams Live Event option -
Confirm the name of the live event on Microsoft Teams.
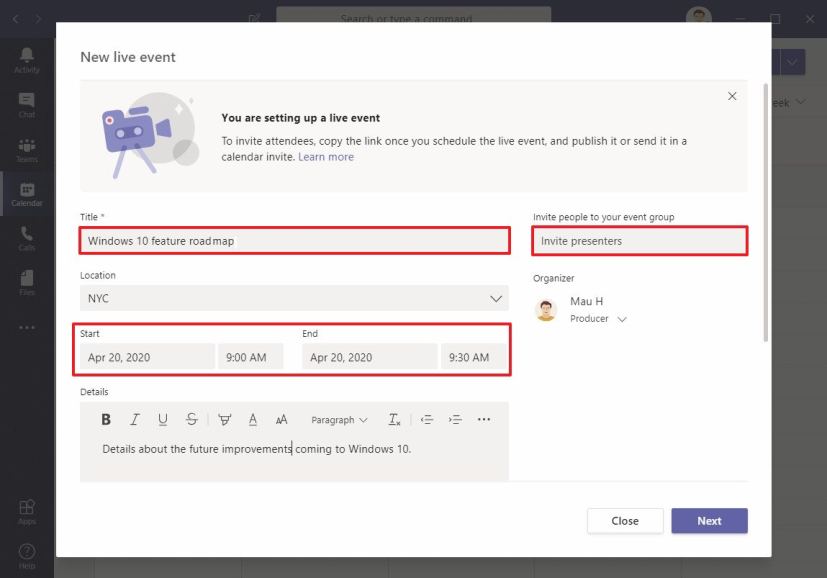
Microsoft Teams Live event settings -
Select the physical location where the event will take place (if applicable).
-
Use the Start and End date and time settings to schedule the live event.
-
Inside the “Details” box, add as much information about the event as necessary.
-
Use the “Invite people to your event group” option to specify the email addresses for one or multiple people who will be presenting on the Microsoft Teams live event.
Quick tip: Under the “Organizer” section, you can use the drop-down menu to switch from “Producer” to “Presenter”. Also, under the “Event group” section, you can specify another person as “Producer.” -
Click the Next button.
-
Select the Teams live event permissions:
- People and groups: Allows you to specify a person or a group that’s permitted to join the event.
- Org-wide: Lets everyone in the organization join the live event.
- Public: This option doesn’t require anyone to sign in, which means that anyone with the link can join the Microsoft Teams live event.
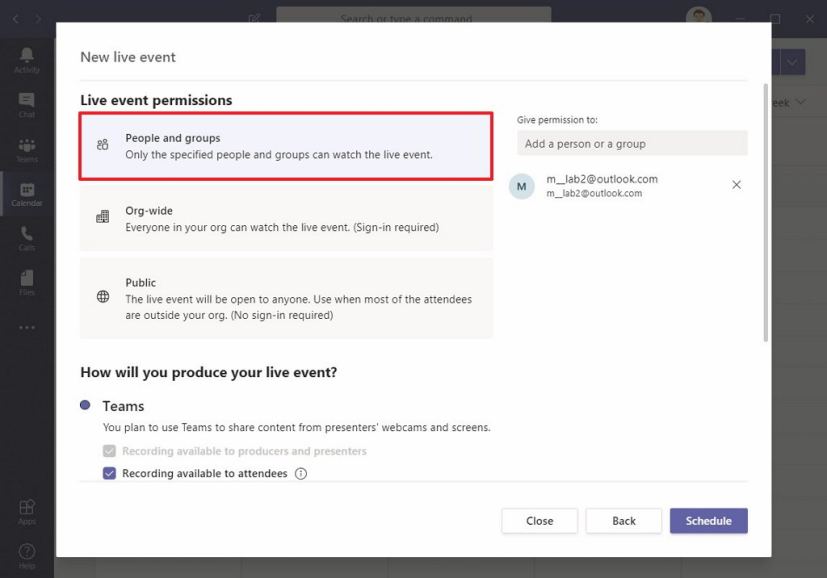
Live event permissions -
Under the “How will you produce your live event” section, select and configure the option:
- Teams (recommended): This option lets you use teams to share contents from the presenter screen and camera. If you select this option, you can also specify other features, such as Recording available to attendees to allow participants to view and download the recorded event. If enabled, live Captions lets attendees to translate the event. Attendee engagement report makes available a downloadable report for producers and presenters to see who attended the event. And the Q&A option allows you create a Q&A session within the live event. If one or more options aren’t enabled, you’ll need to contact your network administrator to set the necessary permissions.
- An external app or device: This option allows you to use other apps or devices, such as professional cameras, with Microsoft Teams.
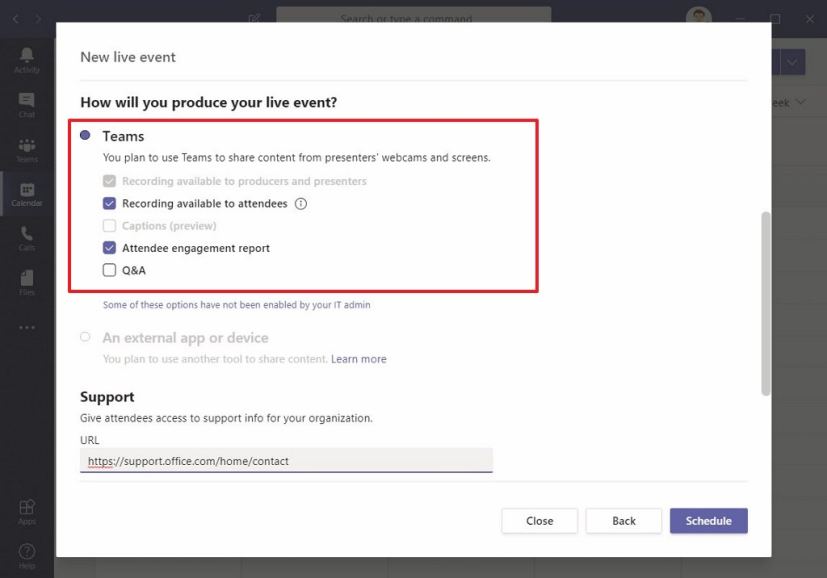
Live event production options -
(Optional) Under the “Support” section, specify a link that attendees can use to get help if they’re stuck and need help during the meeting.
-
Click the Schedule button.
- Click the Close button.
Once you complete the steps, the Microsoft Teams live event will be created, and you’ll be presented with all the details.
If you set up a private live event, the attendees will receive an email with event information and a link to join. If you scheduled a public event, you can click the Get attendee link to get the link that you can share with other people join the Teams event.
