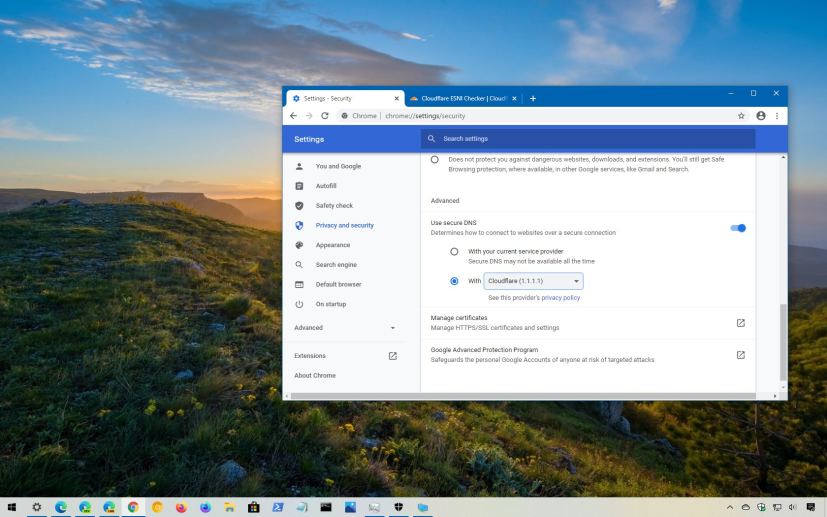
Although most of the internet has already moved to the Hypertext Transfer Protocol Secure (HTTPS) to secure the communication when using the web, the Domain Name System (DNS) queries to resolve domain names to IP addresses are still being transmitted in plain text.
However, the web is now adopting a new protocol known as DNS over HTTPS (DoH), which is designed to increase privacy and security by encrypting DNS queries using the existing HTTPS protocol to prevent attacks and malicious individuals from snooping.
If you use Google Chrome on Windows 10, you can now enable the Secure DNS lookups feature to encrypt your name resolutions for a more secure browsing experience.
In this guide, you’ll learn the steps to enable DNS over HTTPS in Google Chrome.
- Enable DNS over HTTPS (DoH) in Chrome
- Check DNS over HTTPS configuration with Cloudflare
- Configure DNS settings on Windows 10
Enable DNS over HTTPS (DoH) in Chrome
To enable DNS over HTTPS on the latest version of Google Chrome, use these steps:
-
Open Chrome.
-
Click the Customize and Control (three-dotted) button on the top-right corner.
-
Select the Settings option.
-
Click on Privacy and security.
-
Click the Security option.
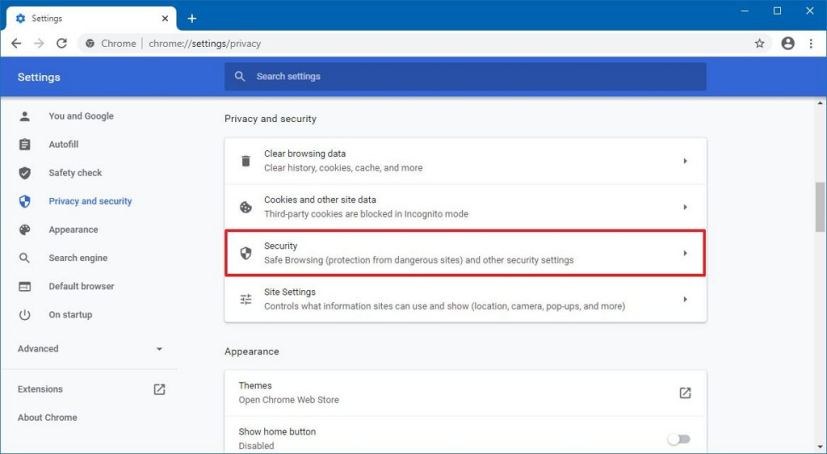
Chrome privacy and security settings -
Turn on the Use secure DNS toggle switch.
-
Click the drop-down menu and select one of the available provider, including Google Public DNS, CloudFlare, CleanBrowsing, or Quad9.
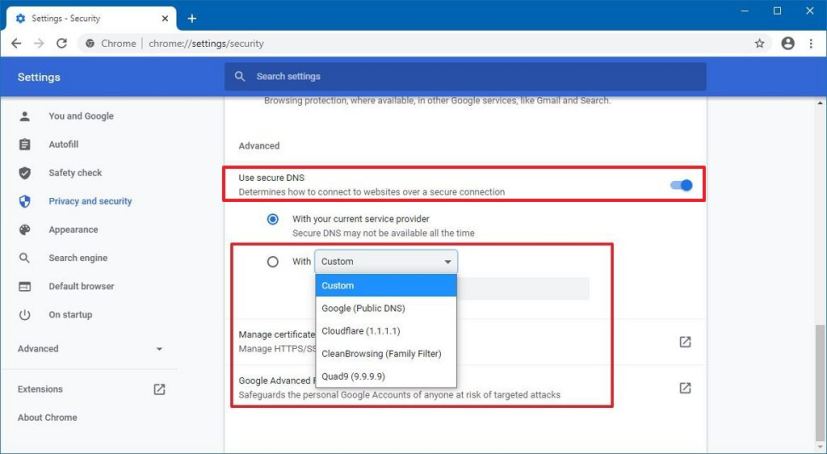
Chrome enable DoH Quick tip: If you select the Custom option, you can specify a different provider that’s not available in the list. If you’re already using DoH on Windows 10, you can select the Use current service provider option.
Once you complete the steps, Google Chrome will transmit DNS queries encrypted improving security and privacy while browsing.
Check DNS over HTTPS configuration with Cloudflare
To confirm the DoH feature is working with the Cloudflare test, use these steps:
-
Click the Check My Browser button.
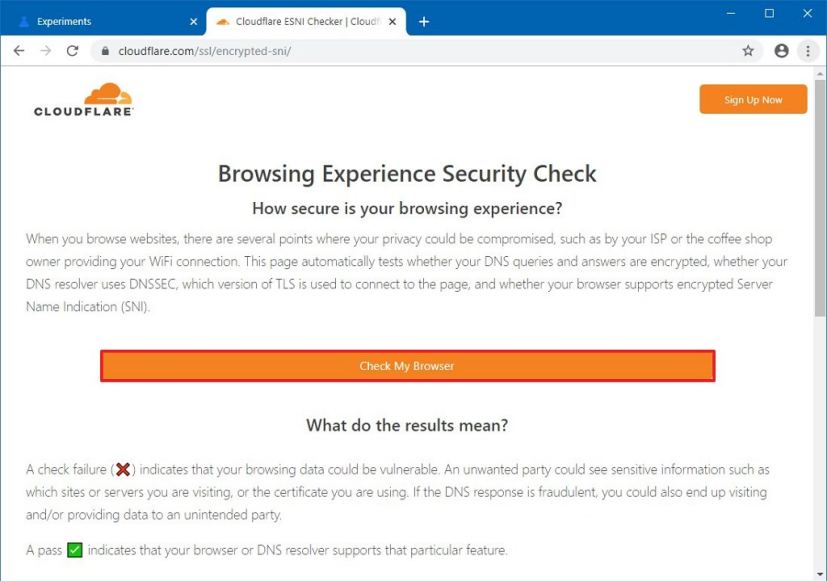
Cloudflare DNS over HTTPS test -
Confirm “DNS over HTTPS” is working correctly.
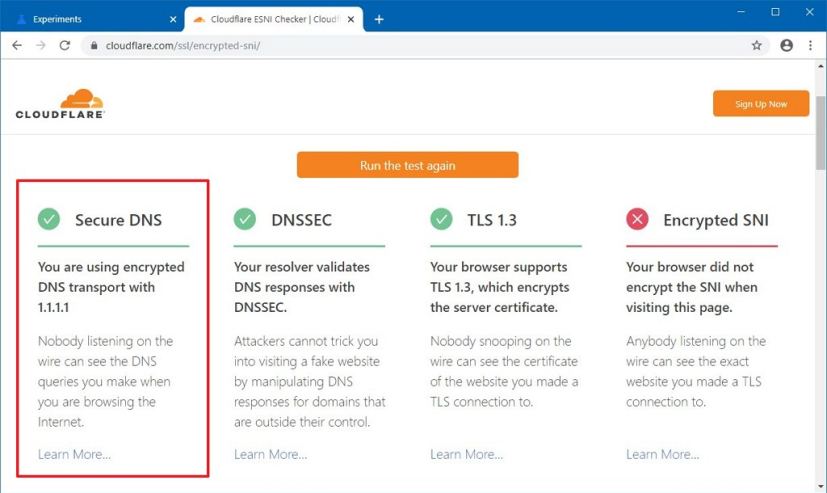
DoH browser test result
After you complete the steps, if you can confirm that the browser is using secure DNS, there’s nothing else you need to do.
If the result shows that “Encrypted SNI” is not configure, it an expected result because Chrome doesn’t support the feature at this time.
Configure DNS settings on Windows 10
If the test shows that the browser still not using secure transport for your DNS queries, then you need to specify the DNS server that supports DoH in the Windows 10 networking settings. You’ll need to perform this task even if you’re already using a supported DNS provider within your router.
To change the DNS settings on Windows 10, use these steps:
-
Open Control Panel.
-
Click on Network and Internet.
-
Click on Network and Sharing Center.
-
On the left pane, click the Change adapter settings link.
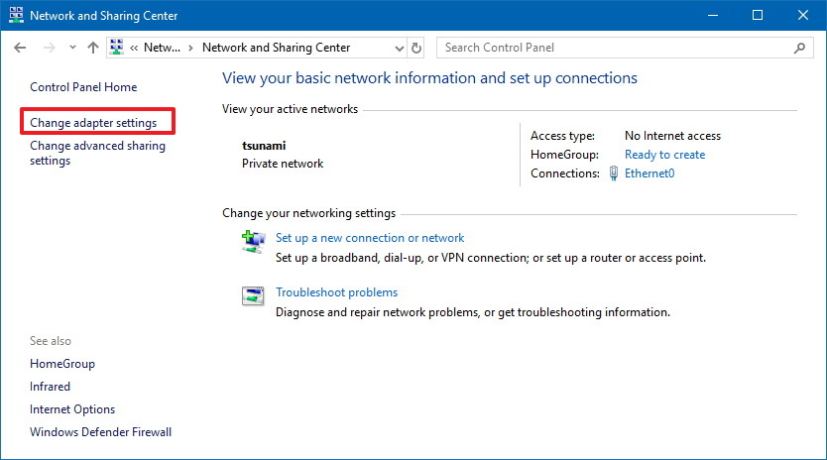
Control Panel’s Network and Sharing Center -
Right-click the network adapter and select Properties.
-
Select the Internet Protocol Version 4 (TCP/IPv4) option.
-
Click the Properties button.
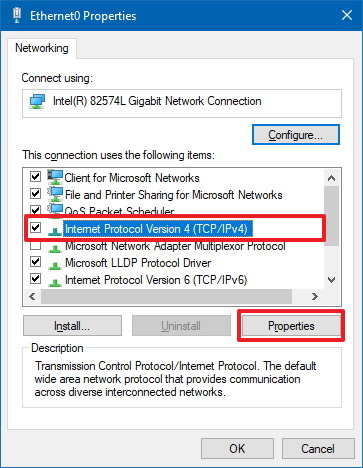
Control Panel’s network adapter properties -
Under the “Use the following DNS server addresses” section set Preferred DNS server, which in this particular case is your router IP address (for example, 192.168.1.1).
-
In the Alternative DNS server section, specify the IP address of the server providing DNS resolutions (for example, the one from Cloudflare, 1.1.1.1).
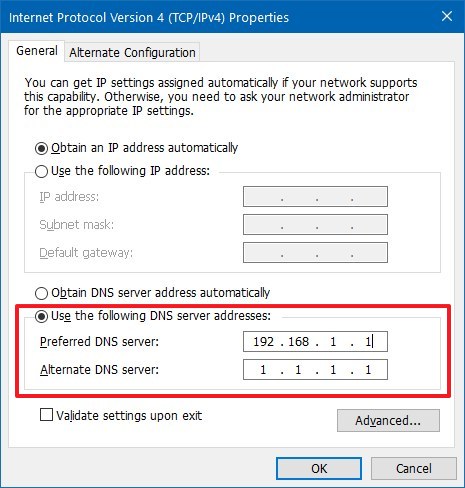
Change DNS settings on Windows 10 -
Click the OK button.
-
Click the Close button.
Once you complete the steps, the DNS over HTTPS test one more time, and now, the name resolution should transmit over the network encrypted. However, eventually, these steps won’t be necessary as Microsoft has already announced that native support for DNS over HTTPS is coming to Windows 10.
Although we’re using the Cloudflare DNS settings, you can use other public DNS providers that also support DNS over HTTPS, such as Google, OpenDNS, Cleanbrowsing, DNS.SB, and Quad9.
If you’re using the Chromium version of Microsoft, you can enable DoH using these instructions, and if you’re using Mozilla Firefox, you can use these steps.
