On Windows 11 (or Windows 10), you can create a USB bootable media with several tools, including Media Creation Tool and the popular open-source Rufus. However, you can also use Command Prompt with the DiskPart tool to create a USB to boot a computer to install Windows 11 and start taking advantage of all the new features.
In this guide, you will learn the steps to create a USB flash drive to boot a computer to install Windows 11. You can also use these instructions on Windows 10.
Create a bootable USB to install Windows 11 with Command Prompt
To create a USB flash drive to install Windows 11 with Command Prompt, download the ISO file, and use these steps:
-
Open Start.
-
Search for Command Prompt, right-click the top result, and select the Run as Administrator option.
-
Type the following command to open DiskPart and press Enter:
diskpart
-
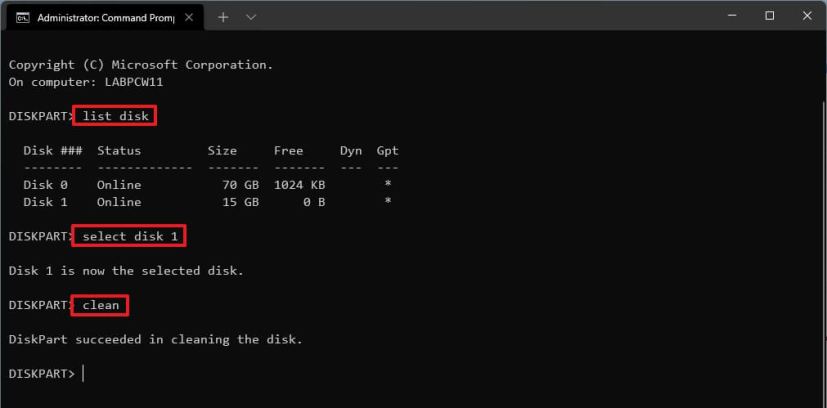
Type the following command to determine the USB flash drive and press Enter:
list disk
-
Type the following command to select the storage and press Enter:
select disk 1
Quick tip: Theselect disk 1command as an example, but you have to replace 1 with the number of the flash drive you want to use. -
Type the following commands to delete everything from the USB flash drive and press Enter:
clean

DiskPart clean USB -
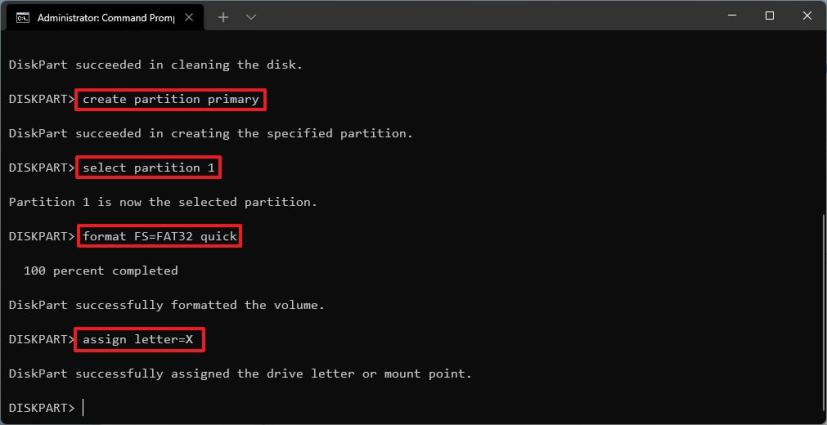
Type the following command to create a primary partition and press Enter:
create partition primary
-
Type the following command to select the new partition and press Enter:
select partition 1
-
Type the following command to make the USB flash drive bootable and press Enter:
format FS=FAT32 quick
-
Type the following command to assign a volume and a drive letter for the USB flash drive and press Enter:
assign letter=X

Create UEFI bootable USB In the command, change X for any available letter you want to use.
-
Type the following command to quit the tool and press Enter:
exit
-
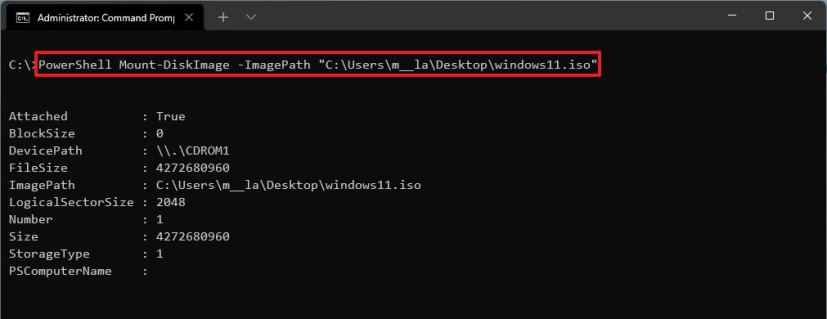
Type the following command to mount the Windows 11 ISO file and press Enter:
PowerShell Mount-DiskImage -ImagePath "C:\path\to\Windows11.iso"

PowerShell mount ISO command In the command, update the path with the location where you have stored the Windows 11 ISO file.
-
Type the following command to relaunch DiskPart and press Enter:
diskpart
-
Type the following command to determine the drive letter for the mounted Windows 11 ISO file and press Enter:
list volume
-
Type the following command to exit DiskPart and press Enter:
exit
-
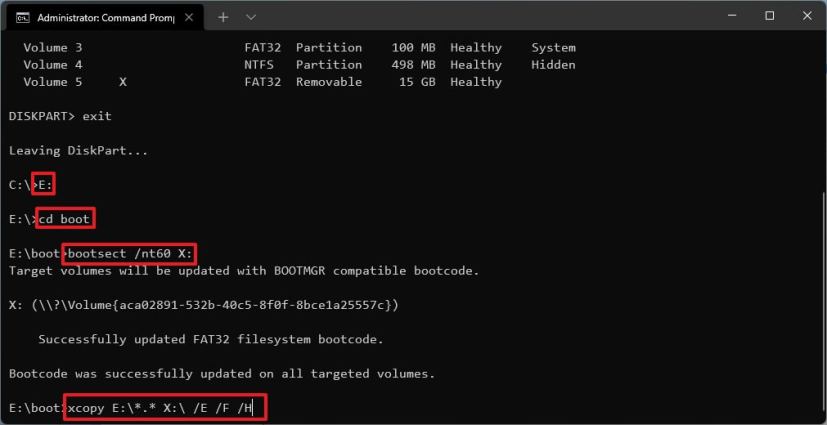
Type the following command to access the Windows 11 ISO file and press Enter:
E:
-
Type the following command to the boot folder and press Enter:
cd boot
-
Type the following command to update the volume boot code for the USB flash drive and press Enter:
bootsect /nt60 X:
-
Type the following command to copy all the Windows 11 installation files to the USB flash drive and press Enter:
xcopy E:\*.* X:\ /E /F /H

Create Windows 11 USB In the command, change the E and X drive letters with the correct drive letters for the Windows 11 ISO image and the USB flash drive, respectively.
Once you complete the steps, you can use the flash drive to start the computer to perform a fresh install of Windows 11.
